


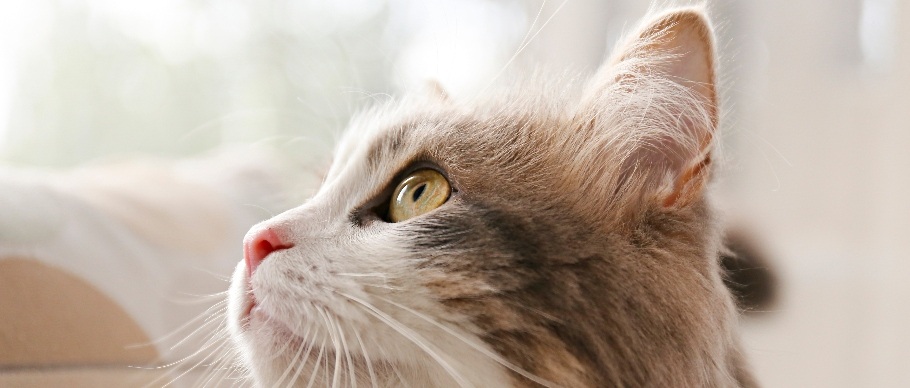
Tips and Advice on Cat Grooming

Many pet parents view cats as self-sufficient furry friends—and that’s true to an extent. Even though these elegant creatures spend a portion of their waking hours grooming themselves, they still need assistance from humans in the grooming department! Cats possess very good grooming tools—their tongue and teeth—but a little extra help from Mom or Dad can go a long way toward keeping them tidy.
Sharing cat grooming duties with your feline friend offers many advantages for both of you, including:
- Keeping your cat cleaner than they can manage on their own
- Providing an opportunity to check for lumps, ear mites, broken teeth, and skin problems
- Controlling cat shedding year-round
- Building a loving bond between you and your cat
Although some kitties are hesitant to accept grooming assistance, a little patience and determination can work wonders. Follow these cat grooming guidelines to promote healthy skin, eyes, ears, teeth, and beyond.
How to Brush Your Cat’s Coat
Learning how to groom your cat starts with their skin and coat. Brushing is an essential task that will benefit even the most devoted self-grooming kitties.
Step 1: Identify Your Cat’s Coat Type
Set a grooming schedule based on your kitty’s hair length. Shorthaired cats (and even cats that don't shed much!) need brushing once a week, but cats with longhaired coats require attention two or three times a week.
How much your cat sheds depends on seasonality, breed, and their own body. Outdoor cats shed most in the spring and fall, while indoor cats—who are exposed primarily to artificial light—shed moderate amounts of hair all year long.
Step 2: Get the Right Grooming Tools
A cat slicker brush is ideal for all kinds of kitties because its bristles capture loose hair without irritating the skin. Plus, brushing stimulates the skin’s oils to promote a healthy and shiny coat!
If you have a long-haired cat breed who is prone to tangles, you will also need a grooming comb. Find a comb with wide teeth and fine teeth, which will let you seamlessly groom the coat without having to switch tools.
Step 3: Brush Gently
Brush in the direction of your cat’s hair growth using gentle movements to achieve the best results. If your kitty has some matted cat hair, work out the knot gently with your fingers before brushing. Groom one section at a time and discard debris, mats, and tangles from the brush.
Step 4: Run Your Fingers Through the Coat
Feel for fleas, ticks, cuts, or anything else that can irritate your cat. Consult your veterinarian if you find anything out of the ordinary.
Tip: For a more therapeutic grooming session, a cat grooming glove will help you remove debris and excess hair while massaging your kitty’s skin. This gentle tool will provide an experience you’ll both appreciate!
How to Prevent Hairballs

As felines groom themselves (or each other!), hook-shaped protrusions on their tongue catch loose cat hair. This hair usually gets swallowed and passes straight through, but some of it may clump in the stomach and form a hairball. This wad of fur is then regurgitated.
Although hairballs are usually harmless, they can lead to intestinal blockage and in some cases may require medical attention. Follow these tips to help keep your kitty’s hairballs to a minimum:
- Groom your cat regularly – Removing loose hair from the coat can prevent your cat from ingesting it.
- Provide playtime and exercise – Cats often resort to self-grooming when they are bored, so offering toys and fun games should prevent excessive licking.
- Give supplements – Supplements that contain fish oil, such as Healthy Promise hairball control supplements, may help prevent the formation of hairballs.
- Feed a balanced diet – Foods that are high in fiber can aid in digestion. Similarly, keeping your cat hydrated helps support digestive tract health.
→ RELATED: Help! My Cat is Getting Hairballs
How to Brush Your Cat’s Teeth
You aren’t the only one who benefits from a daily dental routine! More than half of cats over three years old have periodontal disease, according to VCA Animal Hospitals. Therefore, keeping your furry friend’s teeth clean is essential. Fortunately, brushing your cat’s teeth takes less than one minute per day.
Step 1: Acclimate Your Cat
Before you brush your cat’s teeth, you will need to get them used to having a toothbrush-like object in their mouth. Try dipping your finger in chicken broth and letting your feline friend lick it, gently touching their gumline in the process. Once your cat feels comfortable with your finger near their teeth, it’s time to graduate to a toothbrush.
Step 2: Introduce Dental Supplies
Squeeze some cat-friendly toothpaste onto a cat toothbrush. Before you brush, let your cat lick the toothpaste off to familiarize them with the feeling of the bristles.
Step 3: Start Brushing
Your kitty may feel nervous during the first few go-rounds of brushing…and that’s okay! Start cleaning the front teeth and slowly work your way to the back of the mouth. The more frequently you brush, the more comfortable your cat will feel!
How to Clean Your Cat’s Ears
Cleaning your kitty’s ears is a simple yet critical element of cat grooming, and a quick at-home checkup will help your pet look and feel their very best. Plus, it gives you the chance to discover potential issues you may need to discuss with your vet.
Step 1: Wrap Your Cat in a Towel
To start cleaning your cat’s ears, wrap your cat in a towel and leave only their head exposed. This will provide a sense of comfort and make it easier for you to groom.
Step 2: Wipe Away Ear Wax
Gently bend back your cat’s ear flap and wipe the earwax using a pet ear wipe. Do not use a cotton swab because it can damage the ear canal.
Step 3: Check for Ear Issues
Healthy inner ears are light pink with no odor and no visible wax. If you notice swelling, redness, or small bits of black debris, consult your vet. These signs could indicate a problem such as ear mites or an infection.
How to Clean Your Cat’s Eyes
Conducting a quick eye cleaning is another great way to spot-check your cat’s health and help them look their finest!
Step 1: Swaddle Your Cat
Wrap your kitty in a towel and take them to a brightly lit area in your home. Similar to the ear-cleaning process, this step will help calm your cat and give you greater control.
Step 2: Gently Wipe Your Cat’s Eyes
Using a pet eye wipe, clean around your cat’s eyes and remove any tear stains or gunk. Always take extreme care when using any product around the eye area and be extra careful not to probe the wipe into your pet’s eye.
Step 3: Look for Signs of Eye Problems
Watch out for cloudiness, watery eyes, swelling, and crusty buildup as you groom. Contact your vet if you see these signs, as they could be symptoms of an issue such as conjunctivitis.
How to Clip Your Cat’s Nails
Cats are usually able to keep their nails in great condition. Unfortunately for pet parents, this often involves scratching furniture or other belongings. Learning how to clip your cat’s nails will give your cat the trimming they need while saving your stuff.
Step 1: Select a Quality Nail Clipper
The best cat nail clippers feature stainless steel blades that help you trim quickly and accurately. Make sure the clippers are wide enough to comfortably fit your fingers.
Step 2: Extend Your Cat’s Claw
Holding your cat in your lap, gently press on their paw pad to extend the claw. Your cat may feel hesitant at first, especially if their nails have never been clipped before. Gently massage the paw to acclimate your kitty to the feeling.
Step 3: Start Clipping…Slowly
Once your kitty feels comfortable with their paw in your hand, clip the sharp tip of each nail. Only cut a few nails at a time and give your furry friend short breaks between sessions to ease them into the process.
Step 4: Avoid Cutting the Quick
Do not clip the quick (the pink part inside your cat’s nails), as this may hurt your feline friend and cause them to bleed. If you cut the quick by mistake, touch the end of the nail with styptic powder to stop the bleeding.
Once you learn how to clip your cat’s nails, trim every couple of weeks to keep them prim and proper. You can also offer a scratching post between clippings to help keep nails manageable!
How to Bathe Your Cat

Cats are generally clean animals, but that doesn’t mean they shouldn’t be bathed. Kitties can benefit from some extra cleaning and may even get into muddy messes on occasion, so it’s best to introduce your pet to the tub sooner rather than later.
Step 1: Brush Your Cat
Give your cat a thorough brushing before bath time. Make sure you break up any tangles or mats you notice; they tend to tighten in the tub and become difficult to remove.
Step 2: Clip Your Cat’s Nails
Cats can be excitable during bath time. Following the steps previously outlined, clip your kitty’s nails to prevent damage if they try to scratch you.
Step 3: Gather Your Supplies
Once your cat is thoroughly brushed and clipped, grab your bath supplies and put them by the tub. Essential items include:
- Cat shampoo
- Towels
- Cotton balls
- Rubber bathmat
- Treats
Step 4: Place Cotton Balls in Your Cat’s Ears
Gently put one cotton ball in each ear, which will help prevent water from entering your cat’s ear canals. Once the cotton balls are in, give your kitty a treat for a job well done!
Step 5: Fill the Tub
Submerge your cat up to their shoulders in warm water. Be firm but kind as you fill the tub and ignore any yowling or mewing.
Step 6: Drain the Tub and Start Lathering
Once your kitty is thoroughly wet, drain the tub and apply the shampoo. Start at their head and work your way down the body; be sure not to get water or shampoo in your cat’s eyes. Then, rinse your cat.
Step 7: Dry Your Cat
After the bath, blot your cat dry with a towel. For longhaired cats, a pet-friendly blow dryer may be useful; just be sure to keep it a few inches away from your pet to ensure their skin doesn’t get too hot. Start by drying the upper body and then move on to the sides, front legs, and neck. Finish with the tail, back legs, and belly. Avoid using a blow dryer that’s intended for humans because it may scare your cat or be too hot for them.
Once you learn how to bathe your cat, strive to give them a bath every four to six weeks.
A Well-Groomed Cat is a Happy Cat!
Learning how to groom a cat isn’t just beneficial for your furry friend’s outward appearance; it is also important to their overall health. From maintaining squeaky clean teeth to keeping the coat vibrant, setting a cat grooming schedule provides your pet the care they need for an absolutely purr-fect lifestyle!
